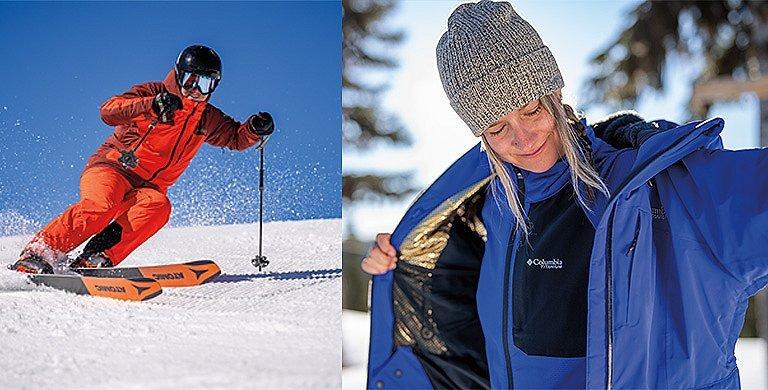
SKI & SNOW
How to Wax Skis and Snowboards
Skiing expert and snowboardcross head coach, Jon Casson, shares his best pro tips for the perfect wax
BY RACHEL CAVANAUGH
We’ve all been there—you’re skiing down the hill when the terrain flattens out and your skis practically come to a stop. Or worse yet, you’re on a snowboard and you have to unstrap your back leg and skate for 100 yards to make the last part of a traverse.
It’s clearly time for a wax. And while you have the option of taking your gear to the tune shop, waxing it at home will save you money, and it can be a fun pre-powder day ritual. But you need to know what you’re doing.
We enlisted the help of ski expert Jon Casson, head snowboardcross coach for Lake Tahoe’s Auburn Ski Club snowboard team. In addition to being the wax technician at dozens of SBX world cups, Casson has worked as sport education director for the US Ski and Snowboard Team and head coach for the Canadian National Team.
He explained that waxing skis and snowboards is basically the same process. The only real difference is that on a snowboard you’re waxing a wider surface area. “From a technical perspective, they're essentially the same thing.”
So whether you're a skier or snowboarder, this step-by-step tutorial will help you dial in the perfect at-home wax.
*For general information on getting started, check out our Frequently Asked Questions.
Having a workspace where you can stabilize your equipment makes it easier to get a nice, even wax.
How to wax your skis or snowboard
Equipment list:
- Bench or table
- Wax
- Waxing iron
- Wax scraper
- Nylon or horsehair waxing brush
- Polishing rag or scouring pad
- Screwdriver
- Base cleaner
- Edge sharpener
- Scraper sharpener
- Vises or clamps
STEP 1: SET UP YOUR BENCH
Before you start waxing your skis or snowboard, the first step is to set up your table. If you have access to a workbench with vises or clamps, that’s ideal, but the backs of chairs or a pair of stools can work too. Just make sure you find a setup where you can stabilize your gear.
“Try to find something that's got a bit of a sticky surface to it so that when you're putting your skis or snowboard down on it, they don’t move around,” Casson explains. “If you use the back of a chair, find something like vinyl or leather instead of wood or fabric. And be careful what you choose—you obviously don't want to drip wax on your nice leather chair.”
Another thing to keep in mind is the height of your workspace, he says. Aim for something at waist level. “You don’t want to be crouching down or spending the whole time completely bent over,” Casson explains. “But at the same time, you don’t want to be reaching up so high that you can't apply any pressure to the board.”
Once the workspace is set up and your snowboard or skis are secured, plug in your iron so it can start heating up. The box from the wax will tell you what temperature to set it at, but it’s usually around 120° to 140° Celsius. “Waxes are formulated for the chemical bonds to break down at a certain temperature, so it’s important to pay attention to this,” Casson notes.
STEP 2: REMOVE YOUR BINDINGS
Skiers can ignore this step, but snowboarders need to remove their bindings first. This is because snowboard bindings have metal inserts that screw into the board. “When you run a hot iron over those bolts, the metal heats up differently than the rest of the base, and you end up with these little dimples,” Casson says. “So don’t skip this part—it's important. They’re easy to remount and it’ll make your base last longer, and you’ll get better performance.” He adds that skiers may want to hold their brakes down with a thick rubber band.
STEP 3: REMOVE OLD WAX
Next, you need to get the old wax out. Casson says this is another important step that people sometimes skip. “When I watch those tutorials on YouTube, this is one of the steps I most often see people forgetting, but it is super important. You have to clean your base first. All of the chemicals that are in the snow from snowmaking, all the dirt, it all builds up. You need to get it out.”
There are two ways to do this. The first option is to use a base cleaner. This is the easiest method, and the one Casson recommends for first-time waxers. All you need to do is take the nylon brush and scrub along the base with the cleaning solution in long, vertical motions. Don’t scrub in circles.
As you work, you’ll start seeing little bits of black or gray dust coming up—don’t stop brushing until wax dust stops coming up. “A lot of people think the base is like a sponge that’s absorbing the wax, but that’s not really what's happening,” Casson explains. “The wax is bonding with the chemical structure of the base to create a stronger bond. All that excess wax is stuff that hasn't bonded yet, so you want to get it out of there.”
The other option is to do something called a “hot scrape.” For this, you essentially do the first few steps of a regular wax, but don’t let it cool. (Follow Steps 4 to 7 of this tutorial, skipping Step 6.) “Instead of letting it cool, you scrape it off while it’s still wet but not fully liquid,” Casson says. “Get it at that moment when it’s kind of goopy like a gel. The stickiness pulls out all of those contaminants.”
Casson recommends moving the bar of wax around a bit on the iron as you drip it, moving systematically from tip to tail.
STEP 4: DRIP THE NEW WAX
Now for the fun part. With everything stable, secure, and in place, turn the iron upside down and hover it two or three inches over your skis or snowboard. Holding the iron at a slight angle, press the wax gently against it and let the hot wax drip down. Begin at one end and move up and down the board systematically in a vertical direction, allowing a small stream of wax to drip onto it.
“Move the wax across the iron while you work so it’s not stuck on there in one place,” Casson advises. “As the wax drips down, you're creating a little stream coming off the iron. Be sure you move from tip to tail.”
As you drip the wax, the surface will become speckled with little dots, which Casson says should be about an inch or two apart from one another. “Every ski or snowboard is a little bit different in terms of how much surface area it has, but you don't need a big thick layer on there. It'll take some trial and error to figure out how much you need and what the spacing is, but you’ll get the hang of it.”
STEP 5: SPREAD IT AROUND EVENLY
Once you’ve covered the surface area of your skis or snowboard with little dots of wax, now it's time to spread it around. The goal here is to make sure it gets onto every inch of the base as evenly as possible. Casson emphasizes that you want to move in long, straight vertical motions, just like when you’re brushing or dripping. Don’t move the iron in circles.
“When you're moving around in circles, you’re all over the place,” he explains. “You can't really tell what's going on. Moving from tip to tail gives you a methodical process so you don’t pass over one area more than another. It’s really important to lay that wax on evenly—otherwise, there's no guarantee that you're creating a consistent chemical bond across the whole base. So go in nice strips. It should take about six to 10 seconds to move up the length of a snowboard, and just a bit longer for skis.”
He adds that you don't need to press down hard on the iron. “A light pressure works fine, like pushing a curling stone across the ice. Just enough to get good contact between the iron and the base. Skis only take one pass—on a snowboard you might have two or three, maybe even four. Then I always do a second pass to go back over it one more time.”
STEP 6: WAIT FOR IT TO COOL
Now that the wax has been applied evenly to the skis or snowboard, you need to let it cool. Give it about 15 to 20 minutes, Casson says—30 minutes tops. Then check how it feels. Both the base and the top sheet should feel cool to the touch before you move on to the next step.
When you scrape your skis or snowboard, press down firmly and keep scraping until the wax stops coming up. Make sure to always use a plastic scraper rather than metal which can damage your gear.
STEP 7: SCRAPE THE BASE
When the wax has cooled, grab your scraper and start scraping it down your skis or snowboard in long vertical motions, the same way that you ironed it. Keep scraping until no more wax comes up.
“Make sure your scraper is sharp so you have a good flat edge,” Casson says, recommending a scraper sharpener if you can get one. “All the extra wax needs to come off. There is sometimes a misconception where people think, ‘Why would I want to scrape off all the wax? I just put it on.’ But none of that excess wax has bonded with the base, so you need to scrape it off.”
Don’t worry about pressing too hard—the scraper isn’t strong enough to damage your base. But make sure you are always using a plastic scraper. This is extremely important. Some ski and snowboard tuning kits come with metal scrapers too, but those are meant for base repairs. Do not ever use a metal scraper to wax skis or snowboards. This can damage your equipment.
STEP 8: REMOVE WAX FROM THE EDGES
After the base is thoroughly scraped, it’s a good idea to run your scraper around the metal edges too. Most scrapers have a small notch in the side intended for this purpose. To use it, place the notch over the edge of your skis and run it up the side. The wax on the edges is likely to come off in the first couple of runs when your gear hits the snow, but it’s still a good habit to get into, as it helps your edges work properly.
Using a brush made from nylon or horsehair, get the excess wax out of the base that wouldn’t come off with the scraper.
STEP 9: BRUSH THE SURFACE
Now it’s time to brush out the excess wax you couldn’t get with the scraper. Do the same thing you did in Step 3 when you removed the old wax, just don’t use any base cleaner this time. Casson recommends that beginners use a brush made out of nylon or horsehair (instead of steel or brass) so you don’t have to worry about brushing too hard. “You can never brush too hard with nylon as long as it's going in the right direction,” Casson says. “Get in there and put some elbow grease into it-—really dig down in there. You'll start to see that wax dust coming up.”
He adds that you can use a spray bottle with water to help collect the dust. “Give it a small spray just before you brush each pass. All that dust will collect in those water molecules and come off your base nice and easy rather than having to blow the dust off. You don't have to do this, but it's a helpful little pro tip.”
He adds that you can use a spray bottle with water to help collect the dust. “Give it a small spray just before you brush each pass. All that dust will collect in those water molecules and come off your base nice and easy rather than having to blow the dust off. You don't have to do this, but it's a helpful little pro tip.”
STEP 10: POLISH THE SURFACE
The final step is to polish your skis or snowboard to give it an even, shiny base that glides fast. You can use an old rag or scouring pad. Some wax companies even make special polishing fabrics. Whatever you choose, make sure you polish in the same tip-to-tail direction you’ve used in previous steps, and avoid going in circles. This will get the last little particles of wax dust out of there and give you a nice finishing polish.
Now that your gear is freshly waxed, you’re ready to get out there and hit the mountain!
Whether you’re riding your local hill or planning the perfect ski vacation, don’t forget to bring the right gear.
For help, check out our tutorials on: .
Now that your gear is freshly waxed, you’re ready to get out there and hit the mountain!
Whether you’re riding your local hill or planning the perfect ski vacation, don’t forget to bring the right gear.
For help, check out our tutorials on: .
Using a brush made from nylon or horsehair, get the excess wax out of the base that wouldn’t come off with the scraper.
Frequently Asked Questions
How often do I need to wax my skis or snowboard?
How often you wax your skis or snowboard depends on how often you use them. As a general rule of thumb, Casson advises waxing your gear every 12 to 15 times you go out. Diehards who hit the mountain every day may need to wax their equipment every couple of weeks, while weekend warriors might get away with just once or twice a season.
“The way you can really tell is when the color on your base starts to fade and you can actually see it starting to get dry. If it’s black, it’ll start getting gray, for example. When you begin to see that dryness around your edges, it’s time to wax your board.” Casson notes that this metric only applies to recreational skiing. At the competitive level, athletes typically wax their equipment daily, oftentimes just minutes before their race. “The more often you wax, the better performance you're going to get.”
“The way you can really tell is when the color on your base starts to fade and you can actually see it starting to get dry. If it’s black, it’ll start getting gray, for example. When you begin to see that dryness around your edges, it’s time to wax your board.” Casson notes that this metric only applies to recreational skiing. At the competitive level, athletes typically wax their equipment daily, oftentimes just minutes before their race. “The more often you wax, the better performance you're going to get.”
How do I know if my snowboard or skis need to be waxed?
A telltale sign that it’s time to wax your gear is when it starts getting slow and sticking to the snow, Casson explains. “A good indicator is when you're getting off of a lift where you have that straight glide and you're not really on an edge—it'll start to feel sticky and slow. It varies with the snow conditions, but you'll notice that you're not traveling as far, or it gives you a little bit of a hitch.” Casson also reiterated the graying of the base, especially around the edges.
Keeping your skis or snowboard waxed regularly allows you to go faster and make your gear last longer. “It's like lubing the chain on your bike,” Casson explains. “The more often you do it, the better performance you're going to get.”
Why should I wax my skis or snowboard?
The main benefit of waxing your skis or snowboard is that it helps you go faster. Not only that, a base that glides smoothly turns easier, and it gives you access to more places on the mountain. “You're going to have more fun,” Casson says. “You're not going to get stuck as often. You're going to be able to get farther across that cat track to get over to the bowl you want to get to.”
Another reason is that waxing your gear regularly helps condition your base. “It protects it from dings,” Casson explains. “It doesn't make it immune—it's not armor, but it helps. You want to take proper care of your equipment. It's like lubing the chain on your bike. The more often you do it, the better performance you're going to get. Your gear will last longer and it will work better.”
Another reason is that waxing your gear regularly helps condition your base. “It protects it from dings,” Casson explains. “It doesn't make it immune—it's not armor, but it helps. You want to take proper care of your equipment. It's like lubing the chain on your bike. The more often you do it, the better performance you're going to get. Your gear will last longer and it will work better.”
Can I use a regular clothes iron to wax my skis?
Many people do it, but using a traditional clothing iron to wax your skis or snowboard isn’t a good idea. There are a number of reasons for this, according to Casson. First, clothing irons typically have steam holes on the bottom, and when you’re waxing skis you want the surface of the iron to be flat. Another problem is that clothes irons have pointy ends at the front, which makes it harder to spread the wax evenly—quality waxing irons have square fronts to help you glide it evenly over your dripped wax. All that said, the biggest reason not to use a clothing iron is that you can’t accurately regulate the temperature.
“One of the most important things you can do when you're ironing is to be at the correct temperature,” Casson says. “With a regular clothes iron, you typically can’t do that. You have settings like Permanent Press or Delicates, maybe Low, Medium, and High—but who knows what exact temperature those are. If you’re going to wax your skis at home, get yourself a proper waxing iron.”
If you do decide to use a clothing iron (which Casson urges against), try to find one without steam holes and make sure to never use it on clothes after that. This could ruin your garments.
Do I need to wax new skis or snowboards?
Yes, that’s actually the most important time to wax your skis, according to Casson. Many people assume that the factory wax makes it ready to hit the slopes, but this is a misconception. “The factory wax may not be all that great to begin with, and it's been sitting in packaging for a long time. It is very important to get some wax into your base so you can start that chemical bond between the wax and the base material as soon as your skis or snowboard comes out of the wrapper.”
What are the different types of ski wax?
There are three main types of hot wax for skis: all season, cold weather, and warm weather. Different brands call them different things. For example, some might call all-weather wax “all purpose” or refer to warm-weather wax as “spring wax.” But generally speaking, you’ll find three varieties—those meant for colder temperatures, those meant for warmer temperatures, and one in the middle that’s an all-weather variety. Most have temperature ratings on the back to help you see if it matches the conditions you’ll be riding in.
In a perfect world, it’s best to wax your skis with different waxes as the weather changes. Some skiers start the winter with cold-weather wax, for instance, when temperatures are lower, and then switch to a warm-weather version when spring rolls around. That said, all-season wax typically works just fine for your average recreational skier.
In addition to traditional hot wax, there are also overlay types you can use in real time while you’re out on the hill. These are sometimes called additives and tend to be used more often by racers, competitive skiers, and more advanced athletes. They come in various styles, including liquid waxes, rub-on bars, and wax pastes.
Ready to hit the slopes? Check out Columbia Sportswear’s selection of winter ski gear.